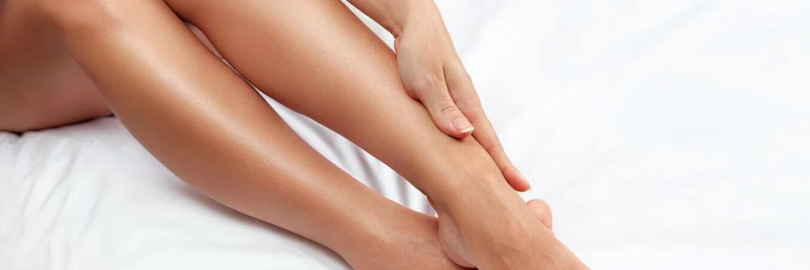
Factors of Influencing Self-tanning Shades Choice
Factors in self-tanning color selection include skin undertones and skin color.
1. Skin Undertones
1) What is your skin undertone?
“Cool tones” and “Warm tones” are just as relevant in picking out the right self-tanner shade for you. This quick tip for pinpointing your undertones:
Warm undertone: Look at your veins in your arms, hands, legs, and anywhere else where they are showing. Veins that are on the greener hue means that you have a warm undertone.
Cool undertones: Purple or blue veins usually means your undertone is on the cooler sidel.
Neutral undertone: If you can't quite tell the difference, chances are you are blessed with a neutral undertone or an undertone with a similar hue as your skin tone.
This rule is definitely not black and white, but it is a great starting point to narrowing down your skin profile.
2) The right self-tanner shade for skin undertones
Here's a fast list to picking out the right self-tanner shade.
For Warm Undertone: Look for shades that are deeper and warmer like a golden brown or mocha shade.
A good identifier is if the tanner has hints of burgundy or yellow.
For Cool Undertone: Go for lighter tans, beiges, or even a subtle peach shade. Never underestimate a soft warm hue as it can still can add depth, but do take caution in going too warm.
For Neutral Undertone: Neutral undertones can be tricky to figure out, but knowing where you are on the hue scale will eventually unlock this unique skin tone's versatility. Remove anything too pink or too yellow from your self-tanning options. We recommend starting off with brown-based tanners.

2. Skin Color
1) What is your skin color?
There are a few different skin tones that you could have. which self tanner would get your skin looking its bronzed best.
Fair skin: Usually considered the palest skin type, those with fair skin are the Snow Whites of the world. The palest of pale, usually with pinkish undertones or lots of freckles.
Light skin: Just a touch along the shade scale are those with light skin. Still pale but not quite porcelain, light skin usually has warmer or neutral undertones.
Medium or olive skin: Those with medium skin tones are in the middle of the shade spectrum. They tend to have warm or more olive tones, and are already naturally a little more bronzed than those with fair or light skin.
Dark skin: Those with dark skin have a rich, deep complexion. Usually, those with darker skin tones will have warmer undertones, but not always.
2) Which self tan shade is best for your skin tone?
The color of your skin should help determine which self-tanner you purchase. If it's your first time delving into the wonderful world of self tanning and you're not quite sure what would suit you, check out these recommendations!
Fair or light skin
If you have fair or light skin, I recommend picking out a self tanner in a Light/ Medium shade to suit pale or light skin tones.These are great for those of you with paler skin, as it's not as dramatic as other formulas, making it perfect for a subtle glow. And if it's your first time self tanning, you might want to reach for a gradual tanner first.
Medium or olive skin
If you have medium or olive skin, you have more flexibility between medium or dark tanners. You can push the boat out with darker shades of tan. Go for a Self Tanning Lotion, Foam or Mist in Dark to deepen your natural complexion and give your skin a warm glow.
Dark skin
Even if you're born with naturally bronzed skin, you can still get your glow on. If you love the look of a deep, dark tan, go for self tanning in Ultra Dark for a natural-looking tan that will suit your skin tone.

Saving Tip: If you like online shopping, don't forget to sign up at Extrabux!(What is Extrabux) , then you can enjoy up to 30+% cashback on your purchase from Extrabux! Sign-Up Bonus: Free to join it & get $20 welcome bonus! Student Benefits:As long as you are a student at school, you can get a free whole year long VIP Card worth $199.
Extrabux.com cooperates with many merchants, such as: Walmart (Up to 4% cashback), Sephora(4% -5% cash back),Dior (Up to 6% cash back), Moosejaw (5% -6% cash back), LOOKFANTASTIC (Up to 10% cash back), Microsoft (Up to 7% cash back) and so on.You can save on buying daily necessities, fashion, beauty, electronic products, broadband installation, mobile communication, air tickets, hotels and other aspects of life!
How to Prep the Skin before Self Tanning
Step 1: Remove hair 24 hours before
This is one of the most important yet overlooked fake tan tips: if you choose to remove your body hair, make sure that this is done 24 hours before you tan. Self tanners are likely to sink into those loosened pores, creating dark spots and an uneven finish.
Step 2: Clean & Exfoliate
Always start off by cleansing your face and removing any makeup or excess product residue prior to application. Use an exfoliating cleanser or scrub - either physical or chemical is fine. Just be sure to choose one that doesn't contain oil, which can keep the self-tanner from absorbing properly.
Slough away dead skin cells with a coarse scrub and focus on rough spots like the knees, elbows, ankles, and heels. Avoid oil-based exfoliants as they can leave behind a residue that causes streaks.
This is going to give you your very best body base for a spray or self tan.
Step 3: Moisturize
To prevent your self tanner from clinging to dry areas or looking patchy, apply a light layer of moisturizer onto dry areas of skin. Don't forget to cover your elbows, knees, hands, and feet (particularly the ankles, knuckles and creases).

5 Fake Tan Steps for Beginners
1. Apply with a mitt
To achieve an even-looking glow, self -tanner should use a tanning glove, smooth a small amount of self-tanner in circular motions onto your legs. It will help to evenly distribute and blend your tan, ensuring a flawless finish every time.
Start at your ankles and work your way upwards to prevent marks when you bend over. Save your hands and arms for last.
Applying tanning mousses and gels: Pump your self tanner onto a tanning mitt, then sweep over the skin using circular motions to achieve an even-looking and streaky-free finish.
Applying tanning mists: Spritz onto the body, then blend with a tanning mitt to achieve a natural-looking bronze.
2. Allow Your Tan To Dry Before Dressing
If you've chosen a gradual or no-rinse tanner, skip over this tip. If you've opted for a wash-off tan, though, this advice applies to you!
We'd recommend allowing your tan to dry fully before dressing. When you do get dressed, opt for something loose and dark. You don’t want it rubbing against your skin or showing any marks.
3. Wash Off Your Tan In Cool Water
If you opt for a wash-off tan, allow it to develop for 4 to 8 hours. Then, wash it off with slightly cooler water than normal, and don't use scrubs or soaps as these can fade your tan. Simply rinse until the water runs clear.
4. Maintain Your Tan
Now that you have a beautiful, bronzed glow, you can do to something to ensure you stay bronzed for longer. We'd recommend gently exfoliating every 2 or 3 days, and moisturizing often. This will help your tan last up to 10 days.
Or after exfoliation, pat dry and apply an everyday gradual tanner, to give your tan a little top up.
5. Remove All Traces Of Tan Before Reapplying It
To prime skin for a fresh tan application, remove all trace of tan. The quickest and easiest way to do this is with a remover mousse and/or tan removing mitt.
Attenion: Not all parts of the body tan equally
Here's something that's often overlooked: not all parts of the body are of the same shade. Some are more pale or redder in the face, some are more tanned in the arms, etc. Just like in makeup, be aware of the different hues from your head to your toes, and adjust accordingly to get the most even glow possible.

When Should You Apply Self-Tanner?
It may seem counterintuitive, but according to Tan-Luxe global tanning expert Alexandra DiMarchi, the best time to tan your face is at night. "This way, the product can sit and develop evenly overnight," she explains. Consider it a part of your evening skin-care routine.
How to Self Tan Your Back?
How to self tan your back
Method 1: Call a friend or a partner
Perhaps the easiest way to apply self-tanner to your back is with a friend or someone else to help you. You may find that, no matter how hard you try or how many different methods you use, it's practically impossible to self-tan your back by yourself.
When you ask a friend to help you self-tan your back, it can be very useful for them to have a full range of motion to do so. Even if you do manage to self-tan your back yourself, it can be hard to see exactly what you’re doing and how well you have blended it, etc.
Method 2: Use a self-tanning back applicator
If you're on your own, you can apply it with a mirror and a self-tanning back applicator. The fact that it's the easiest and most effective option, not everyone has a friend or partner to come over at short notice. If you are looking to buy a self-tanner back applicator, here are some recommendations: Self-Tanning Back Applicator or Non-absorbent Band.
1) Self-tanner applicators are made of a long stick with a padded section at the end for applying the self-tanner.
Just like a mitt, you use them to blend the self-tanner into your skin for a natural, streak-free finish. Because the stick is longer than your arm, it gives you more access to your back and even other areas on your body. In terms of precision, a stick applicator is more accurate when trying to fix a certain area or spot. At the same time, it's more difficult to blend with, as you must hold it at an awkward angle.
2) As well as self-tanning back applicators, you can use a non-absorbent band, which is another back self-tanning solution. It looks like a long piece of material and you can hold it on either side.
If you struggle to reach behind your back with a stick applicator, a non-absorbent band will be easier to use, as it has handles on either side which you hold with each hand and use it to rub up and down your back. Unlike the stick applicator, you can use a non-absorbent band to blend the product into your back very easily. It is less precise but is more likely to produce a softer, smoother blend than with an applicator.
Method 3: Use a tanning body mist
Forget trying to awkwardly sweep a tanning mitt over your back, the easiest and fastest way to self tan your back is with a tanning body mist.
Bow your head slightly. Reach over your shoulder and spritz the mist from side to side, holding the bottle at neck level. Bring your arm down (level with your belly button) and spritz on either side to create a gorgeous, even-looking finish.

How to Self Tan Your Face
1) Just as you would rid your knees and ankles of dry skin before you tan your body, you should exfoliate your face too to ensure your canvas is smooth.
2) Brush your teeth before you tan! Toothpaste is whitening, remember! Toothpaste can collect at the side of your mouth and remove tan from the area if you do it afterwards.
3) Make sure you have clean, makeup-free skin.Founder of tanning brand Isle of Paradise and tanning expert Jules Von Hep suggests splashing your face with cold water to close the pores for a more even tan.
4) Lightly moisturize around the nostrils and other dry spots with an oil-free moisturizer.
5) Only apply one coat of slef-tan on your face. Less is more when you apply self-tan to your face. Faces that have too much self-tan on them look unnatural. Take your time when applying, starting with a thin layer. It's easier to add more tan than to remove it.
6) Recommend you to apply your face tan with a brush because it buffs the tan onto the skin, pushing the colour in deeper, minimising the risks of streaking or patching.
If you're using a face tan mist, I recommend you spraying it right onto your brush. Starting in the centre of your face buff the colour in circular motions, remembering to blend product into the hairline. Then work down the neck and across the décolletage using circular, blending motions.
7) After your initial face tan application, spritz another pump of the tanning mist onto your brush and sweep up cheekbones and into the hairline. Blend the colour into the temple area of the forehead and then down, across and into the jawline to achieve a lifted and sculpted look.

How to Tan Your Feet?
Tanning your feet isn't as difficult as it looks! The trick is to remember that less is more. When you've finished applying self tan to your body, use the leftover product on the mitt to cover your feet.
1) Make sure you’ve exfoliated and moisturized the back of the heels.
2) Rub a makeup brush along the mitt to gather the excess tan.
3) Sweep the brush over the top of the feet, along the toes, down the sides, and across the back of the ankles
4) Blend into the creases and toes.
5) Wipe the toenails and the soles of the feet to remove any excess.

Don't forget to sign up at Extrabux.com , then you can enjoy up to 30% cashback on your order!
Read More:
2025 Best Self-Tanner: Bondi Sands vs. St.Tropez vs. Loving Tan vs. Jergens?
Top 8 Best Self-Tanning for Fair Skin Beginners in 2025(For Body & Face)
Dior Backstage vs. MAC Studio Face and Body vs. NARS Sheer Glow Foundation: Which is Best for You?
Lancome Teint Idole vs. Estee Lauder Double Wear vs. YSL All Hours: Which Foundation is Best for You?Which Foundation Is Best for You? Fenty vs Nars vs. Estee Lauder Double Wear
Parfum vs. eau de Parfum vs. Eau De Toilette vs. Cologne: What is the Difference, and How to Choose?
Coach vs. Kate Spade vs. Michael Kors Bag: Which brand is better? (History, Quality, Price & Design)
Goyard St Louis vs. Louis Vuitton Neverfull vs. Longchamp Tote: Which Will Stand the Test of Time?
Jo Malone vs. Diptyque vs. Byredo vs. Le Labo: Which Brand Wins the Luxury Candle Showdown?
CHANEL vs. Louis Vuitton vs. Gucci Bags: Which Brand Is The Best? (History, Design, Quality & Price)
Gucci vs. Louis Vuitton vs. YSL Wallet: Which is the Best to Invest in 2025?

Extrabux is an international cashback shopping site, offering up to 30% cashback from 10,000+ Stores!
LOOKFANTASTIC, SkinStore, SkinCareRx, Feelunique, Cult Beauty, Sephora, Belk, Estee Lauder, Lancome, La Mer, Kiehl's, Clinique, Elizabeth Arden, Adore Beauty, Sol de Janeiro, Hourglass, Lancer, Shiseido, FOREO, Macy's, etc.
Join to get $20 welcome bonus now! (How does Welcome Bonus work?)
Recommendation
-

Is Turkish Airlines Good for International Flights?
-
10 Best & Stylish Winter Coats for Women on NET-A-PORTER in 2025
-

Top & Best 12 Sneaker Apps/Websites for Raffles, Releases & Restocks in 2025
-

7 Best Gift Card Exchange Sites - Buy, Sell and Trade Discount Gift Card Safely and Instanly!
-

Top 9 Professional Skincare Brands for Licensed Estheticians 2025


